Baldesion Arsenal:
Savage Slimes Guide
Click on the images to access the corresponding sections:

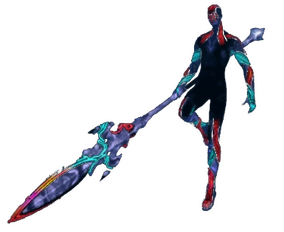
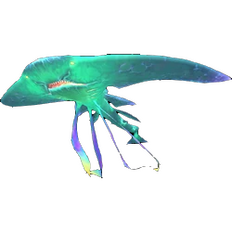
Ovni

Portals and Entering
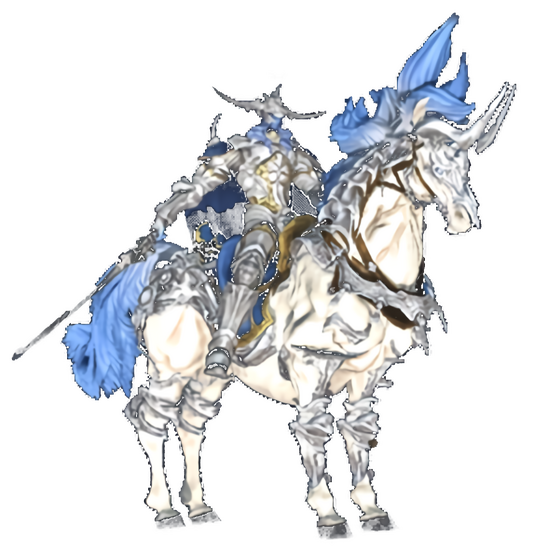
Art / Owain
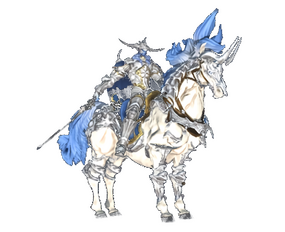
Raiden
Elemental Rooms
Absolute Virtue

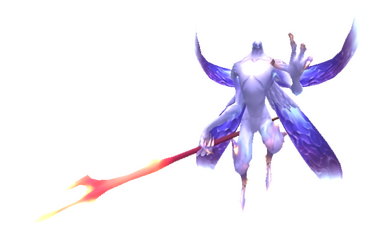
Ozma
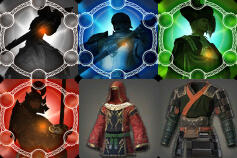
Support

° Prerequisites and sign ups °


• REQUIRED:
- Specific Logos Actions & Wisdoms (← click me!)
- Elemental Rank 60 & Hydatos questline completed
- Disciple of War or Magic (lvl 70+)
- Understanding basic English calls• OPTIONAL:
- Elemental Gear (Kirin's Osode/Vermillion Cloak)
- 6 Logos Action trays (default is 3, which is fine, too!)
(3 additional trays can be unlocked by trading Aethertight Flasks to the Expedition Scholar in Hydatos Base Camp. Flasks can be obtained from Silver Chests from the Hydatos Bunny Fate "Drink Me")


• HOW TO SIGN UP?
- A notice will be posted in the channel #ba-announcements with a Google Form
- This form must be filled, then the Raid Leader will build the roster
- If you are in the roster, you will receive a (temporary) role as well as a ping to inform you. Keep an eye out for your discord notifications!
° FAQ / USEFUL INFO °
• Duration?
- A run may last from 1h30 to 2h30 - depending on Ovni spawn times!
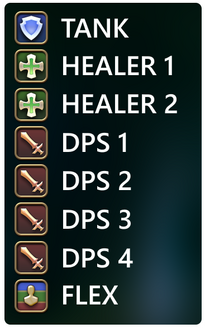
• Run composition?
- Up to 7 teams: 1, 2, 3, 4, 5, 6 + Support
- Standard team composition: 1 tank, 2 healers, 4 DPS & 1 FLEX (any)


• How does raise work?
Normal raising methods do not work in BA, but there are a few special ways to get raised:
- Spirit of the Remembered = 70% chance upon K.O.
- Sacrifice L = 100% chance but user gets the "Doom" debuff
- Healer LB3 = 100% chance


• Mark of Mortality?
- Getting hit by an avoidable mechanic = 1 stack of the Mark of Mortality debuff
- 3 stack will result in a doom
→ Play it safe and respect mechanics

• Do I need an Aetheric Stabilizer?
- No. Portals are typically assigned as shown in the Portals and Entering section. Using a Stabilizer interferes with the assignments.
→ You can talk to the Expedition Scholar in Basecamp to check if they offer you Stabilizers. If they do, you have BA unlocked. Do not buy one.

• Logos Manipulator?
There is a Logos Manipulator at the entrance of BA to craft wisdoms + actions.
You cannot come back to this point after you dropped down to the first bosses.
Do never use /return unless told to do so. It teleports you to base camp.
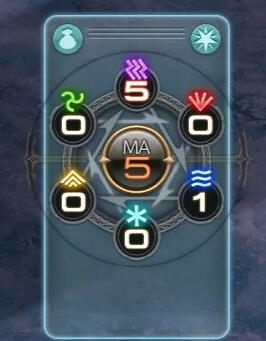
• /magiaauto?
Put 5 magicite in 1 slot and activate /magiaauto at the entrance.
This will automatically spin your wheel to offensive.
Using /magiaauto again will put you into defensive, using it a 3rd time turns it off.
Healers will be using Refresh L to keep your charges active!

• Positionals?
There are no positionals in Eureka content. Don't try to do them!

° Ovni °

Dispel

Damage UP


Important
- Hit Ovni at least once, all Tanks turn Stance on
- Boss buffs itself and needs to be dispelled
→ Fluorescence
Before Ovni
- Do not use Logos Actions yet
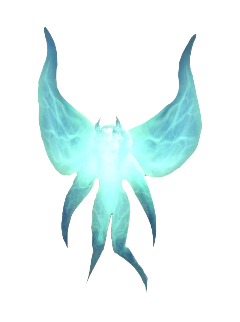
- Scout the map for Fairies (Hydatos Elementals)
- Do not flag them im shout chat, just tell your Party Lead
- Dot not take the Fairy Buff yet
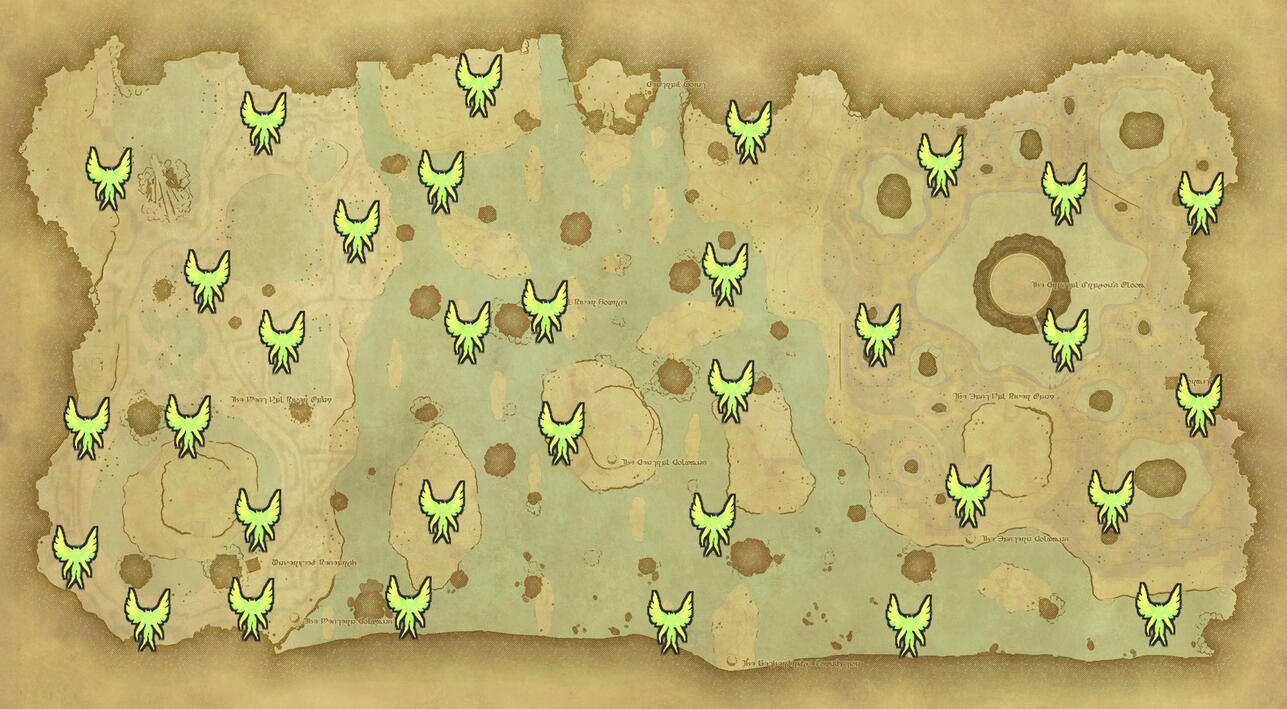
Potential fairy locations

Fluorescence buff
Ovni
• Fluorescence: Dispel the stacking damage buff

Ion Shower Marker
• Ion Shower: take the purple marker away from everyone else

Aetherially Primed
• Pull of the Void: Pulls nearby players in, paired with one of those:
- Concussive Oscillation: Point Blank AoE → Move away
- Megastorm: Donut AoE → Move inside the hitboxOnce Ovni is about to die
• ⚠️If you are dead: Do not accept any Revives until rewards / buffs went out
• Wait inside the Fate area to receive the Portal buff ("Aetherially Primed")


° Portals and Entering °

Portal Locations
Important
- Portals are pre-assigned depending on your Party Number.
- After Ovni's death, your Party Lead assigns you a number from 1 to 8, refer to the map.
- If you cannot find your portal, ask your Party Lead for help.Click on the image to enlarge it!

Blue Portal
Blue Portals
- 48 blue portals appear 3 minutes after Ovni dies.
- Blue portals need a specific item to allow access to BA
- We do not take Blue Portals on organised runs - do not interact with them!
Red Portal
Red Portals
- After 3 more minutes, Blue Portals are replaced by Red Portals.
- Those portals can be taken without any requirement aside from the buff from Ovni.
- Those portals are used on organised runs.
Inside BA
1. Activate your Spirit of the Remembered
2. Activate a tray with a Wisdom + action
3. Wait on the Bridge to be buffed with Shell + Protect
4. Recraft trays at the Manipulator at the front right

Click on the image to enlarge it!
Quick Guide Logos Actions
For a deeper explanation refer to our Logos Guide on Discord which has extra guidance.
Or check our sheet: Logos Actions & Wisdoms

Bare minimum as DPS:
Wisdom of the Skirmisher
→ If you can, use better ones:
Duelist - Melee
Elder - Caster
Fiendhunter - phys. Ranged

Until Elemental Rooms:
Wisdom of the MartialistElemental Rooms and onwards:
Guardian or Indomitable

Healer First Timer:
Wisdom of the Aetherweaver
If you want more healing:
Ordained or Templar

Everyone:
Spirit of the Remembered: Always have one active.
Craftable with Aetherweaver + Martialist + Platebearer (Conceptual Logograms)
Bring backup Spirits and Wisdoms just in case you die!


° Art °
• Legendcarver: Point Blank AoE → get away
• Legendspinner: Donut AoE → get inside the hitboxArt will summon 4 spears around the arena.
The boss executes Legencarveror Legendspinner.
The spears will then copy the AoE afterwards.
Default Mechanics:
• Thricecull: Tankbuster
• Acallam Na Senorach: RaidwideLate mechanics (rarely seen):
• Legendary Geas: Floor turns dark. Do not run around before it goes back to normal (Attacking is ok)
• Gravity Ball (no cast): Red marker over 1 player: Move away from the group and keep running, an AoE will be chasing you.
• Explanations:
• Fight Video:
° Owain °

• Elemental Shift: Boss element changes to Fire or Ice
• Elemental Magicks: Point Blank + same element spears explodeOwain will summon spears around the arena.
DuringElemental Magicks, move to a spear of the opposite element.
Default mechanics:
• Thricecull: Tankbuster
• Acallam Na Senorach: RaidwideLate mechanics (rarely seen):
• Spiritcull: Triangles stack, AoE markers move out
• Hands (no cast): 2 adds appear and tether to a random player each. DPS them down as fast as possible.
If you are tethered: Look away from them, they come close. Turn towards them before they reach you.

Triangle - Stack

AoE Marker - Move out
• Explanations:
• Fight Video:


° Raiden °
• Ame-no-sakahoko: Huge point blank, the boss jumps backwards
• Whirling Zantetsuken: Donut AoE → stay inside the hitbox
• Lateral Zanetetsuken: Half-arena cleave, move away from sword
• Lancing Bolts: 6 red markers over random players.
Spread them out, do not overlap. Follow the call, DPS them down if needed.
Default mechanics:
• Shingan: Tankbuster
• Spirit of the Fallen: RaidwideLate mechanics (rarely seen):
• Booming Lament: Red Puddle - quickly move out of it.
• Cloud to Ground: Exaflares. Start on their side. After the first explosion, move to where it was.
• Bitter Barbs: Tethers 2 players to each other. Break the tether by moving apart. Avoid Cloud to Ground AoEs while running away from each other.
• For Honor: Point Blank AoE
• Explanations:
• Fight Video:


° Elemental Rooms °
We will encounter elemental-themed rooms twice :
1. after Raiden and before Absolute Virtue, we search for a hidden portal in 6 rooms.
Be careful about mobs and traps.
2. After we went through the portal, we enter a second set of rooms: Support Rooms

Click on the image to enlarge it!
Support Rooms
• 6 Rooms: 1 trap per room + 2 enemies to spawn
• every party covers 1 room
• Tanks use invuln to pop the trap (inform your healers if Dark Knight)
• Tanks turn stance on, use a defensive Wisdom and go into defensive magia:
/magiaauto def
• When everyone is ready: all Tanks stand in the portal: spawn 2 mobs
Triggering the portals will also spawn the Support Fate in Hydatos.

Reflect L
Note about Reflect:
The damage in Earth Room can be reflected, including ground AoEs. This is sometimes done when not all parties are filled.
This only works for Earth Room.


° Absolute Virtue °

Feint L

Shell L
Feint & Shell
- Feint L: Reduces evasion of the boss, use when in melee range. Keep it up.
- Shell L: Applied to everyone before the pull, raidwides hurt.

• Eidos: Changes the color of AV's bracelet / applies a buff to the boss
• Hostile Aspect: "Puddle mechanic" - close to opposite color
• Medusa Jaevelin: huge conal AoE - stay close and doge
• Impact Stream: room split - stand on opposite color, treat as raidwide
• Turbulent Aether: "Tethers" - stand inside an opposite color puddle
Always stay close and behind AV.
AV plays with colors: Light and Dark. The bracelet will change it's color and the boss receives a buff.
Go towards to the opposite color of AV / AV's bracelet.
Avoid coloured areas unless you need to stand in them to resolve a mechanic the room split or the orb tethers.
Default mechanics:
• Auroral Wind: Tankbuster (small conal AoE!)
• Meteor: Raidwide
• (Baited) Proximity AoEsLate mechanics (rarely seen):
• Triple Impact Stream: 3 room splits in a row
• Call Wyvern: Spawns 2 adds - those need to die as soon as possible
• Double Impact Stream: Resolve clone first, then AV
• Explanations:
• Fight Video:

Refresh L

Perception L
Refresh L + Perception L
If you were assigned one of the following, you can swap them out for a tray with Wisdom + DPS action here, they are no longer needed:
- Refresh L (Healer only!) → if you have Bravery L, it's useful for AV and Ozma!
- Perception L (DPS only!) → bring an additional DPS action for AV and Ozma!


° Ozma °

Shell L
Shell
- Shell L: Applied to everyone before the pull, shared damage hurts.

Key Mechanics (short):
• Acceleration Bomb: Debuff. Stop moving and (auto-) attacking, put your weapon away, untarget the boss.
• Meteor: Place them on the markers 1 and 2. One meteor per marker.
• Blackhole : Everyone stand on the assigned buffer.
Ozma goes into 3 different shapes which determine upcoming mechanics and movements:
• Star • Cube • Pyramid •
⚠ Do not cut corners when moving. If you fall, you die.
⚠️ Acceleration Bombs ⚠️

• Debuff on 3 random players across the raid.
• Do not move / (auto-) attack / emote.
• Sheathe your weapon, untarget the boss, wait until timer runs out.You explode in a deadly AoE if you move when the timer runs out.
If you realise early enough: move to the ring to avoid getting a meteor.See below how to make your Debuffs easily visible from HUD menu.
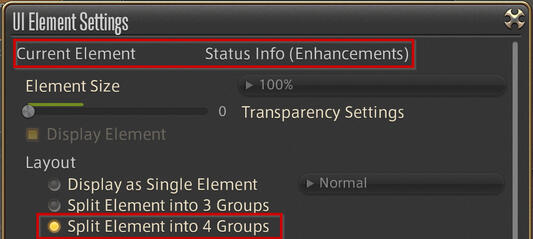
Split Status Info
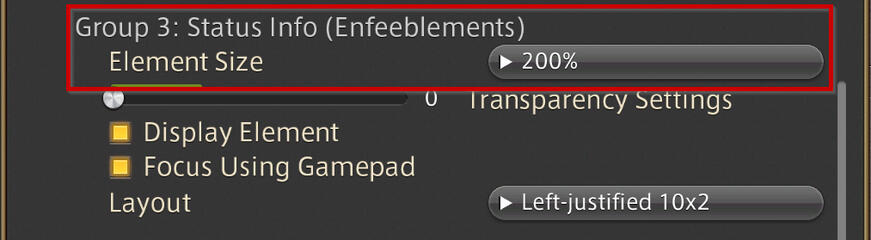
Debuffs to 200%


Click on the images to enlarge them!
⚠️ Meteors ⚠️

• Red marker and big AoE around 2 players per platform.
• Bring marker to the back or the left, on the 1 and 2 marker.
• Look for the second meteor. Adjust to each other.Move back to the group when they turn into a proximity marker.Off Tanks: Turn stance on and provoke / grab aggro off the adds.
Everyone kill adds as fast as possible.


⚠️ Blackhole ⚠️

• Melees & Tanks stay on the plattform for uptime (A, B or C marker).
• Ranged & Healers move off the platform and to the left on the ring (the 2 marker).
• You need to be on a black hole buffer when the cast goes off.
• Will occur between every phase change.The Arena:
• Do not cut corners.
• Each party is assigned to a platform (see picture)
• Raid Lead will tell support party where to go
Fight Timeline: After introduction mechanics, Ozma goes through it's 3 shapes in a random order, before repeating 2 random shapes and finally enraging.
On organised runs, all of this will be called out and explained again before the pull.
The Ozma Shadows in the back will mirror the movement mechanics - go close or far to those shades.

Cube Phase
• Movement: close
• Platform Main Tank right
• Party left.
• Off Tank mitigate, pop orbs to the right (Invuln does not work.)
• Holy: unindicated knockbacks

Pyramid Phase
• Movement: sides
• "Bleedbaiting" - 1 Healer per platform in the back + Esuna themselves
•⚠️Meteors
•⚠️Acceleration Bombs

Star Phase

• Movement: far
• Stay together - autoattacks are shared, do not gapclose
•⚠️Meteors
• indicated knockbacks from platform portal


How to recognise a movement early
The upcoming shape of Ozma or its Shadows appears early in chatlog, you can filter them into a dedicated chat tab.
Click on the images to enlarge them. All movements are called out!
Cube Phase
At the start of Cube Phase, 2 Orbs will spawn on each ring and start moving clockwise. They explode in an AoE when touched.
Off Tanks handle those orbs.⚠️Invuln does not work.

⚠️In case the Off Tank dies, a platform Main Tank can stand at the back, on the edge towards the ring (stay on the platform), use mitigations and let the orbs come towards you.
• Explanations:
• Fight Video:

Congratulations!
You’ve cleared The Baldesion Arsenal. Or at least, its guide… Once you do clear, find your Demi-Ozma mount in your achievements: “Battle” → “Field Operations” tab
PS: Don’t be afraid if you died and got sucked out, there will always be more runs ✨

° Support Fate °
" Soup "
What is Support Fate?
The actual name is "The Baldesion Arsenal: Expedition Support", which the community often shortens to "Support" or "Soup".
The Fate spawns when the main parties activate the portals in Elemental Rooms and needs to be cleared to allow the raid to kill Absolute Virtue.
→ located in the south-west of Hydatos and drops 30 Hydatos Crystals.
It applies the same buff as Ovni to everyone with a Gold rating.
After Support, 8 random blue portals will spawn, which turn into 8 random red portals.
Support party will take these portals and join the main parties afterwards.

Feint L

Dispel L
Feint & Dispel:
- Feint L: Reduces evasion of the boss, use when in melee range. Keep it up.
- Dispel L: Boss buffs itself and needs to be dispelled
→ English: Shock Spikes& Mighty Strikes
→ French: Pointes de foudre& Frappe puissante
→ German: Schockstachel&Mächtiger Schlag

• Tornado II: Donut AoE - get in
• Aeroga IV: Pointblank AoE - get out
• Dualcast: uses both AoEs after another, random order
• Spine Lash: Frontal cone AoE - go to the sides or behind
• Meteor: Raidwide - lethal if you missed Dispel
• Shock Spikes - ⚠️ needs Dispel
• Mighty Strikes - ⚠️ needs Dispel
° Logos Actions °
And how to use them


Roles and Action Assignments
The smooth completion of BA requires specific logos actions.
Some raid-utility is specifically assigned in the run channel and explained below.
First Timers to BA

Off Tank - Tanks only
Keep your stance off for most of the run. Bring a defensive Wisdom in your trays (Guardian or Indomitable). You will tank on two occasions:
- Elemental Rooms: Equip Guardian or Indomitable and tank the 2 mobs in your room
- Ozma: When Cube phase is called, use all Mitigations and run to the right to collect 2 orbs - check the reference image. Whenever meteors are called, pick up adds.

Refresh L - Healers only
Use during hallway sections from the start until Absolute Virtue. Massively increases the regeneration rate of Magia Wheel spins, which means we can use /magiaauto.
Bring 2 plates with Wisdom + Refresh L, in case you die.

Spirit Dart L - DPS only
Useful throughout the whole raid. Applies a 60s debuff on the target: enemies take 8% more damage.
Bring 2 plates with Wisdom + Spirit Dart L.
Experienced Players

Main Tank - Tanks only
Please visit the dedicated page for Tanking.

Feint L - Tanks or Healers
Used for Absolute Virtue and Support Fate (Tristia). Apply the debuff to the boss to lower its evasion.
Can also be useful during Ozma's Pyramid Phase, if a lot of people do not have an active Spirit of the Remembered (anymore).

Bravery L - Healers or Casters
Use during the entire raid or equip at Absolute Virtue. It is a 10% DPS buff for 5 minutes. Apply to party members and others outside your party. Typically assigned to experienced players due to the cost. Usage is newbie-friendly.
If assigned, bring 2 plates with Wisdom + Bravery L, in case you die.


Perception L - DPS only
Please visit the dedicated page for Trapping.

Reflect L - technically everyone
Assigned only in case of missing a party/tank to cover the Elemental Room of Earth. Enemies in this room deal exclusively magical damage, including auto attacks.
If assigned, enter the room alone und unequip all gear. Apply Reflect to yourself and then step into the blue circle. Keep the buff up on yourself - you can stand in AoEs.
Bring a single tray with only Reflect and a backup tray with Wisdom + Action to use after rooms.